Linutop TV Documentation
Copyright © 2025 Linutop SAS
|
|
Linutop TV is a Digital Signage System, available on the Internet (Cloud / SaaS) or as a local private server (On-Premises). More info on linutop.tv. |
- Table of Contents
- 1. Linutop TV Overview
- 2. Introduction of Linutop TV signage manager
- 3. Create a playlist
- 4. Broadcast your Playlist on your screens
- 5. Interactive digital signage
- 6. Template management
- 7. Connect your Player to your Linutop TV account
- 8. Local installation of your Linutop TV private server
- 9. FAQ
Chapter 1. Linutop TV Overview
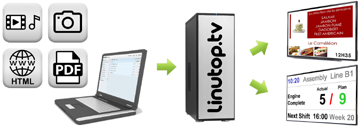
Linutop.tv allows to broadcast media on screens
Linutop tv is a media broadcasting system (images, pdf, videos, audios, web page) composed of 2 elements:
- A Linutop TV server (Cloud) or private on-premises
- A player, Linutop Kiosk software integrated in Linutop OS available for PC and RaspberryPi
The Linutop tv server allows you to organize playlists and program the media display. Players synchronize with the servers and locally copy the media files minimizing network usage. They can also turn off the screen.
Required setup
- A player per screen (Linutop mini PC or Raspberry Pi with Linutop OS)
- A network connection per player (Cable or wifi, IP/HTTP)
- A server (local) or service (Cloud) per player (Linutop.tv)
The private server Linutop tv can be installed in a VM (Virtual Machine), a PC, a Raspberry Pi. It can even be installed in a player.
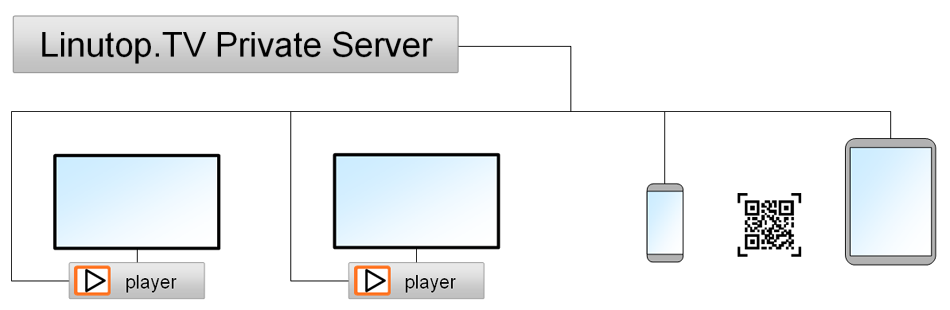
Linutop.tv digital signage solution network configuration and protocoles
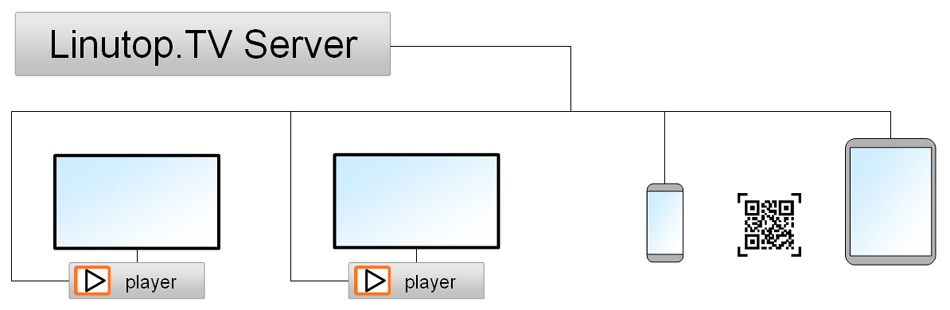
Display on screens using Linutop Kiosk players or with the web player on smatphone / tablet via QRcode.
Network Protocoles: The Linutop.TV server and its Linutop Kiosk player use the HTTP or HTTPS protocol on 80 port and Raspberry Pi may need NTP Protocole for clock sycronisation.
Chapter 2. Introduction of Linutop TV signage manager
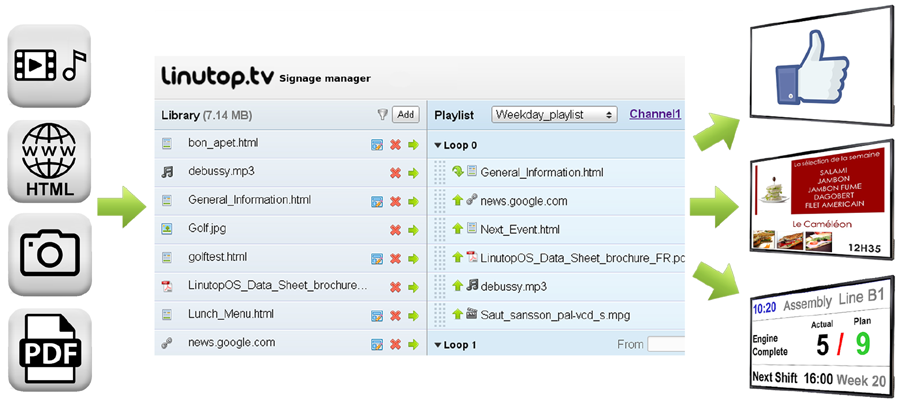
How to display media on your screens with linutop.tv
The linutop.tv signage manager allows you to display your media on your screens, in just 3 steps:
- After login at Linutop.tv, Upload your files (media) into your library
- Create and configure your playlists (order, duration, ...)
- Check the distribution of your playlists on your players, or connect your players
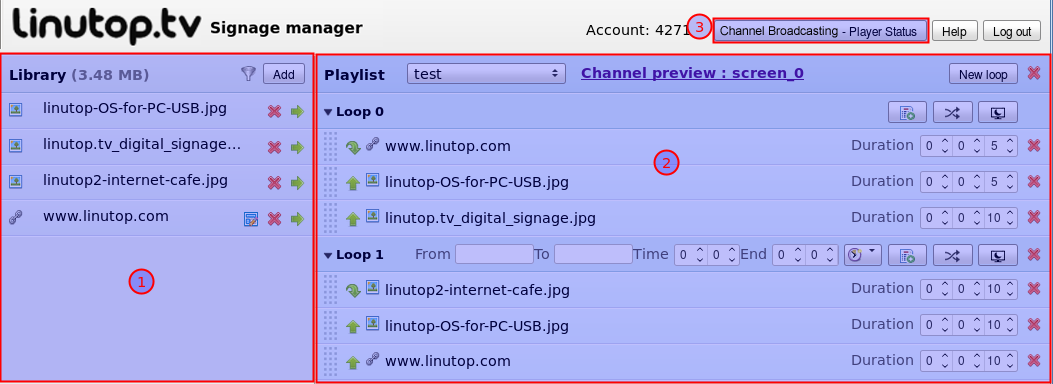
- Library : It lists all the files you have uploaded
- Playlist : This interface allows you to organize your items within a playlist
- Channel Broacasting - Player Status: It allows you to set the broadcast of your playlists by assigning a playlist to each player and displays the status of each player connected to the server.
This tutorial will help you set up your display system.
Library
The library is an online space where you can store your files (images, videos, music, URLs and document templates). Click on the "Add" button (at the top of the library) to upload your files. You can also sort your files by type and add all the files of the same type directly into a loop (from the current playlist).

Add media to the library
Add an image or video: upload the file from your computer.
Add a website or video feed: Enter the web path (URL) to use.
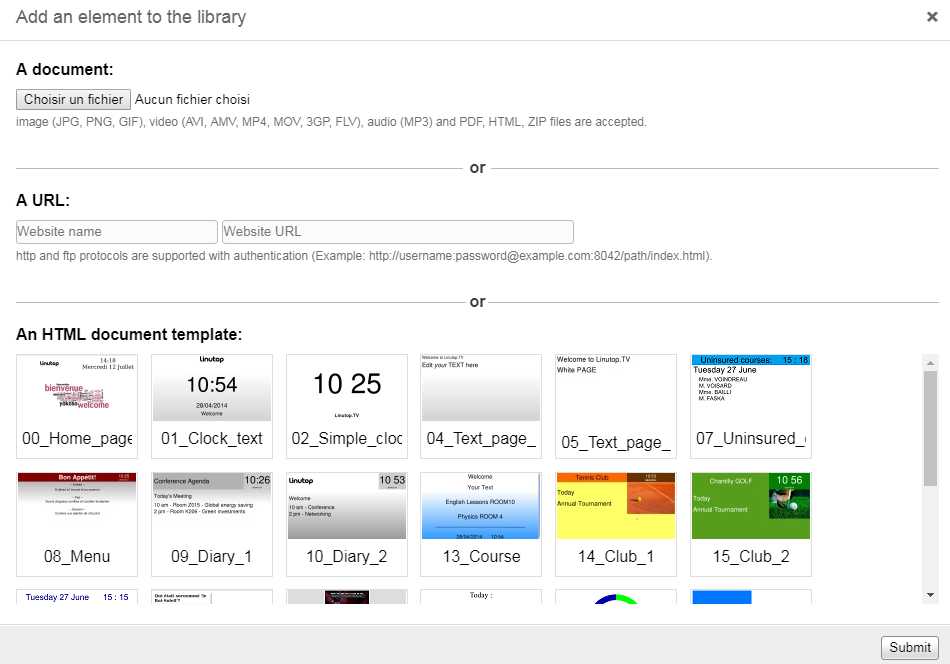
Add an HTML page: select a template, edit and name it.
Once the edited elements, click on "Validate" to integrate the media in your library.
Note: The upload can take several minutes, depending on the size of your files.
The total size of the library is limited to 1GB.
To edit a document template, click the edit icon. To delete an item, click on the red cross.
Formats supported by Linutop TV:
- Videos (.avi, .mov, .mpg, .wma, .mp4, .flv)
- PDF (page by page)
- Images (.png, .jpeg, .gif)
- Audio (.mp3, .wav, .ogg, .flac)
- URLs (http://, https://, ftp://, rtsp://)
- HTML document templates
Note: The .zip format allows you to upload multiple files in a single upload.
Chapter 3. Create a playlist
A Playlist is a list of different medias, which are present in your Library.
Set up a playlist
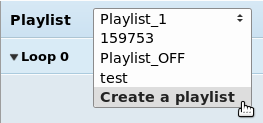
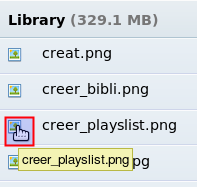
- Click on the drop-down list "Playlist / Create a Playlist"
- Name it (only alphanumeric characters)
- Your Playlist will appear in the drop-down menu

Add and Organize medias in your Playlist
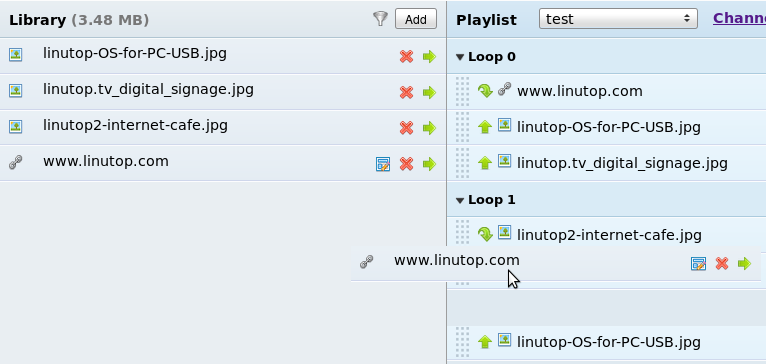
Drag a media from your Library and drop it on the loop of your Playlist or an item in the loop to add it, or use the green arrows to move the elements (touchscreens).
Choose:
- The Display time with the hh / mm / ss format for each media
- The Display order (using drag and drop)
Delete a file from your Playlist by clicking on the red cross associated with the file (at the end of its line). It will be the same process to delete a Playlist or a loop.
Loop
The loops are used to organize the Playlist. They allow for example to:
- Start to display a Playlist at a specified time
- Choose to display your Playlist only the monday
- Stop to display the Playlist and shut down the screen
- ...
Add a loop by clicking on the "New loop" button.

- From/To: Enter the loop starting and ending dates. If none, the loop will always be displayed.
- Time/Duration: Enter the loop starting time (HH:MM format) and duration (HH:MM format).
- Repeat: The Playlist will be displayed only on selected days.
- Shuffle : Click this button to shuffle the loop. By default it will be played in the order
 and when you click on the
 button, the reading will be done in random order.
 - OFF : Click on the
 button to turn off the player's screen. When extinction is activated
  the loop bar is dimmed.
View the playlist or an item in a browser
To see a playlist in Linutop.tv, you must first associate it with a string (in "option - player state") then click on the links that appear next to the playlist name

Note: You can view only the content of the loop 0 in the browser.
You can also view each item individually by clicking its icon, from the library or playlist being edited
Modify your Playlist
The Playlists are saved automatically after each change. The result will not be displayed immediately on your screens
The displayed Playlist is updated every 30 minutes by default. This can be changed in the Linutop Kiosk configuration.
In addition, it is possible to insert an element belonging to a different loop , setting the time of broadcast.
Note: Between each element, the player checks if another loop should be displayed.
If you need or want to see your modifications sooner:
- Validate your modifications on Linutop TV
- Restart the Linutop Kiosk on your Linutop Player
To delete a Playlist, select it and click on the red cross on the right side of the "new loop" button.
Loop execution order
The player executes loop 0 by default if no other time condition in the other loops is valid.
In addition, it is possible to insert an element belonging to a different loop by setting its broadcast time. But for this, it is necessary that the loop to insert is priority. The loop with the lowest number is the loop with the highest priority
Note: The test selection of the next element is performed between each element.
Chapter 4. Broadcast your Playlist on your screens
Configure your broadcast
Once the playlist has been edited (files order, display time, loop, etc.), click on "Settings". A menu will allow you to associate a Player (screen) with a Playlist (created online).
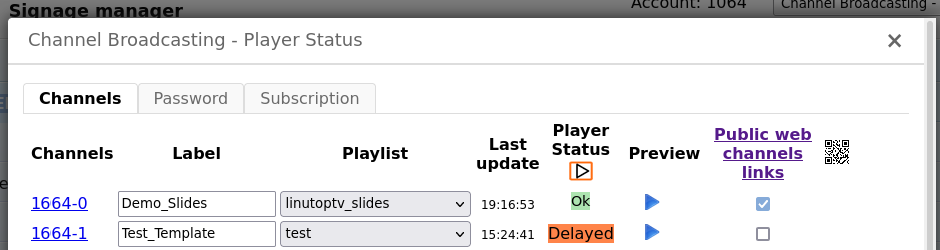
- The "Password" tab allows you to change the password of your Linutop TV account.
- Channels : Linutop Player number (mini PC Linutop linked to the screen and with the Linutop Tv configuration). The Player could be a PC or Raspberry Pi running a Linutop OS as well.
- Label : Add a description according to its localization, its function, etc. (example : "waiting room", "London offices", ...).
- Playlist : Choose the Playlist that you would like to Display on this Player. The playlist "Server_OFF" will shut down the Player screen.
- Last update : Time of playlist's last update. When you hover over this box, date and time are displayed entirely.
- Player status : This column display player status :
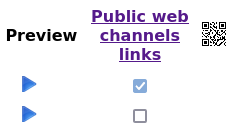
- Preview : By clicking on the blue play button, you can preview your playlist.
- Public web channels links : By checking this box, the selected playlist becomes public and is visible to all. The Server generate a QRcode for an horizontal (classic) or vertical display on smartphones or tablets.
Monitoring the broadcast via the player status
In the menu "Settings - Player Status" (part 3 in Chapter 1), It is possible to watch players status. Several states may appear. They are listed below with their significations.
- If information is "Ok" : Your player has been updated in the last 30 minutes.
- If information is "Updating..." : Your playlist has been modified but the reader is processing the update.
- If information is "Delayed" : Your player is outdated for at least 30 minutes (or disconnected from the network).
Note: If the player is "Delayed", it may just be disconnected from the network. It will continue to display the playlist as it was downloaded locally.
Broadcast via the online player
|
To make a channel public, just check the box opposite its name (in the public column). It is also necessary that his name be unique, that there are no other public chains of the same name. You can also view all channels from this interface. |
|
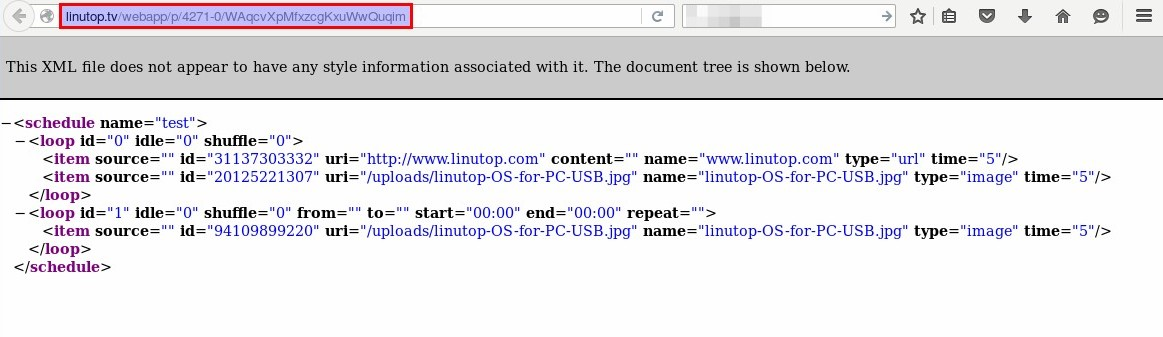
Once the channel is made public, you can access it from the url "linutop.tv/webapp/channels" (page opposite). This page lists all your public channels.
This feature is also available for private linutop.tv servers, for use on the local network
Note: Restricting the player Online: The online player only broadcasts the loop 0, and the media may not be compatible depending on the browser.
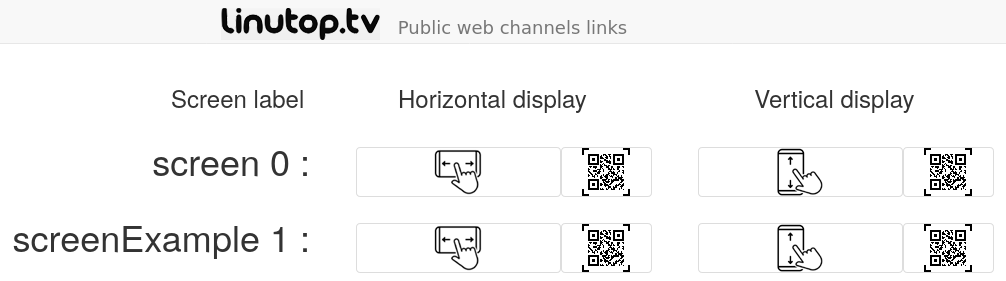
You have access to an "horizontal" web player wich displays the media alternately depending on their associated time, and also to a "vertical" web player, better suited for sdmall screens, wich lists all the media on the same page.
QRcode for web broadcasting
The public channels page also offers a button allowing you to display the url of a web player as a QRcode:
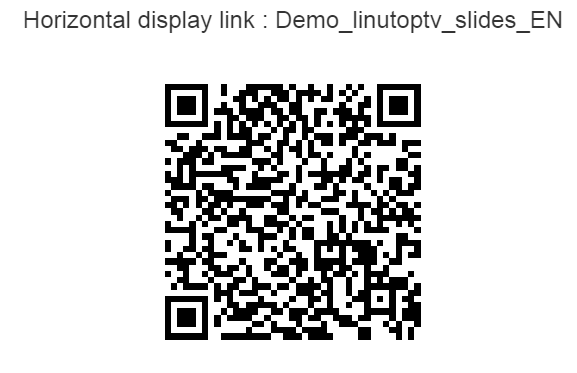
You can scan this QRcode to easily obtain the url of a web player on a mobile device.
You can also save the QRcode's image or take a screen shot to print it.
Playlist code display
On the Linutop Player web browser, log in Linutop TV and open the "Settings" window, click on the screen number.

You can see what the server is sending to the player.
Validate by clicking the "Ok" button.
Go back in the "Linutop" - "Linutop Kiosk - Launcher" menu. Your Playlist will be displayed on your Player.
Chapter 5. Interactive digital signage
On a screen with the Linutop kiosk player
Linutop kiosk allows you to go to the next element with a mouse click or a contact on a touch screen. It is possible to pass in complete web mode on a URL with a mouse movement or by pressing a key by setting up the kiosk in web mode and screen saver, in the general tab, it will go back to dynamic display at the end of the timer of the web kiosk session.
On a web browser with the web player (smartphone or tablet)
The LinutopTV server offers two web players for browsers :
- Horizontal mode allowig to make the elements scroll automatically depending on the timer.
- Vertical mode allowing to scroll quickly through the elements on a touch screen.
Those players are available with a QRcode even in private mode. This broadcast option allows you to do mobile display and avoid physical contact with a document. The formats taken into account are more limited than with the Linutop-kiosk.
Chapter 6. Template management
Edit a template
A template is a html page which can be edited. You can place a picture or a text. Linutop TV offers some pre-edited models.
To add a Template, click on one of the pre-edited templates, then "Submit"
You are now able to configure the template according to two different methods.
Note: Templates allows you to keep an HTML page on the screen even in case of network failure. Unlike a url, which is reloaded each time.
Visual Mode
This mode let you display and edit your template
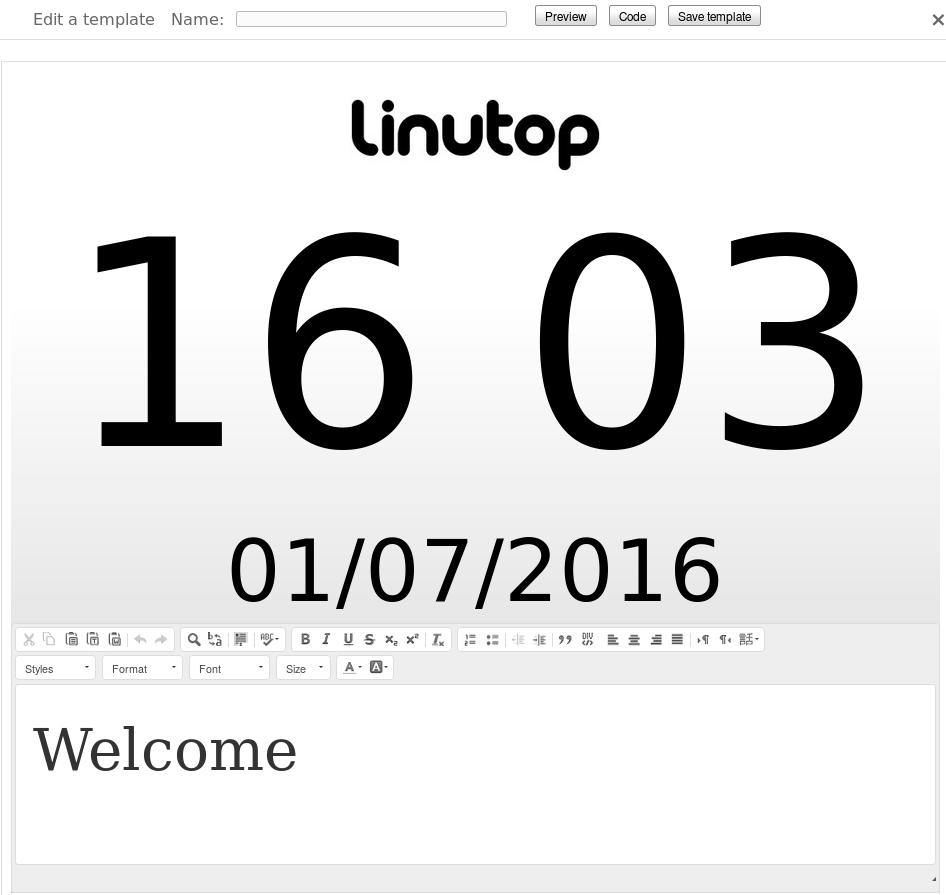
The bottom area let you edit the text with regular text edit interface.
HTML Mode (for advanced users)
Click on the
 button. The HTML code of your template is now accessible. The edition of the code results in the automatic update of the preview.
Creating templates
There are several ways to create a template. Either by starting from a template or by creating your template (HTML page) and then putting it online as a .html document (thanks to the "add" button in the library menu)
Example of template structure:
<html>
  <head>
    <style>
      .text {text-align: center;  font-size: 6em; }
      img   { max-width: 50%;  max-height: 500px; }
    </style>
  </head>
  <body>
    <div class='text'> <img src="http://linutop.com/images/linutopxs_right_side_ll.jpg"
alt="image"> <br/> Hello! </div>
  </body>
</html>
This mode allows to create a local HTML page with, possibly animations in javascript
To be able to edit the template without going through the HTML code, just add these tags:
For the text boxes (a place in the <div class='text'> so as not to alter the HTML edit mode)
<div class="editable-block">
  <div class="content"> </div>
  <div class="editor">
    <textarea name="editable" id="" cols="30" rows="10" class="editable" style="display:
None;"> </textarea>
  </div>
</div>
For images :
<img src="http://linutop.com/images/linutopxs_right_side_ll.jpg" alt="image"
class="editable-image">
For images locally :
<limage>/library/AIR-TRAVEL_template.jpg/limage>">
This configuration requires an image in the library and it will be transmitted to the player locally with the template.
Note: These two pieces of code let you edit the template using the visual mode.
Using templates
In the Linutop TV library, you can add your templates in 2 different ways:
- Template available on the server
- Personal template
If you have included images in your templates. They must also be added to the library so that they are well taken into account.
Finally, simply broadcast your templates by pressing the arrow to the right.
Here are some examples of templates available on the server:
|
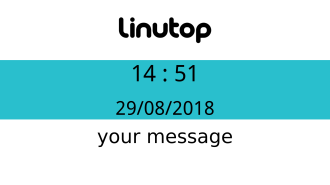
Welcome Template
|
This template allows you to display a graphic logo, the time, the date of the day and your message for a lobby. |
|
Template Horloge
|
Cette template vous permet d'afficher un logo graphique, l'heure, la date du jour et une image de bienvenue pour un hall d'accueil. |

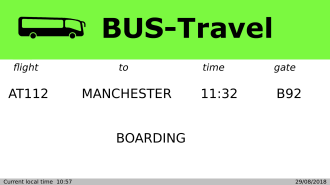
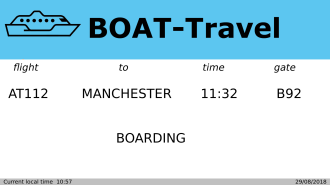
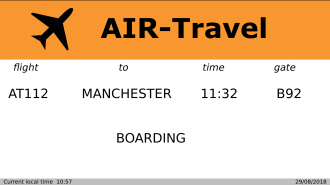
Template: for a bus station, a pier and a small airfield. It can display a message via a web browser from a phone or tablet connected to the local network.
Note: The background image of these templates is available by clicking on the icons. It is composed of an image of 1920x1080 allowing to accommodate all the images by including the modifiable text.
You can also create your own template adapted to your preferences. This is a simple html file, it is very easy to edit.
View and save your template
You can preview your template by clicking the
 button then the
 button to return to editing your template.
Once your modifications are done, you can save them by clicking
 (do not forget to name your template, or it will not be possible to save it).
Chapter 7. Connect your Player to your Linutop TV account
Player connexion to Linutop TV online (SaaS / Cloud)
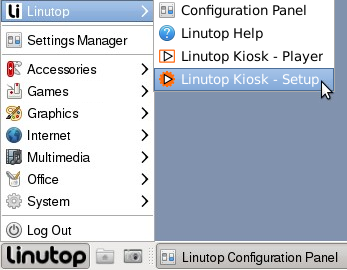
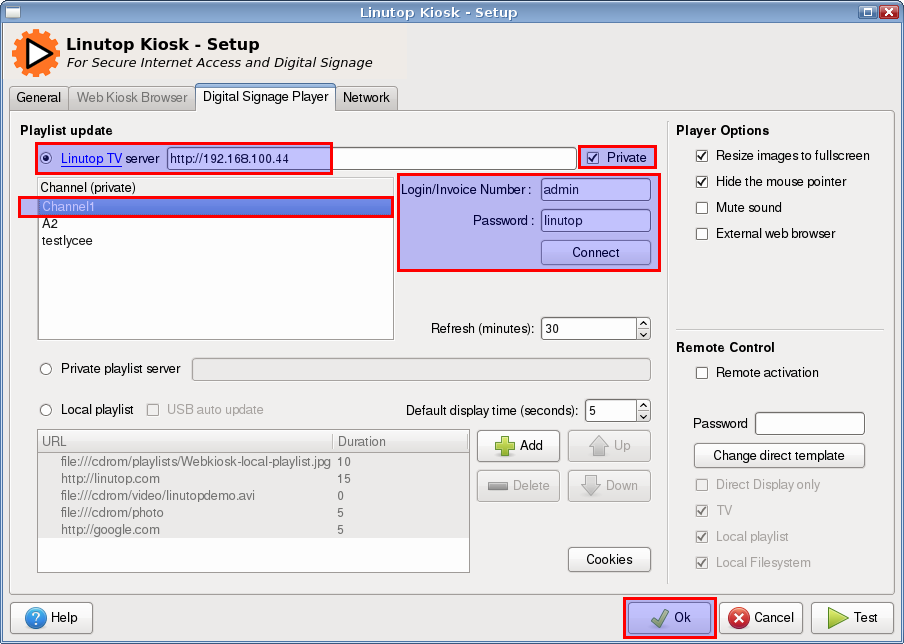
To access your playlist, you must now configure the Kiosk. Go to the Linutop Kiosk Setup menu : "Linutop" - "Linutop Kiosk - Setup".
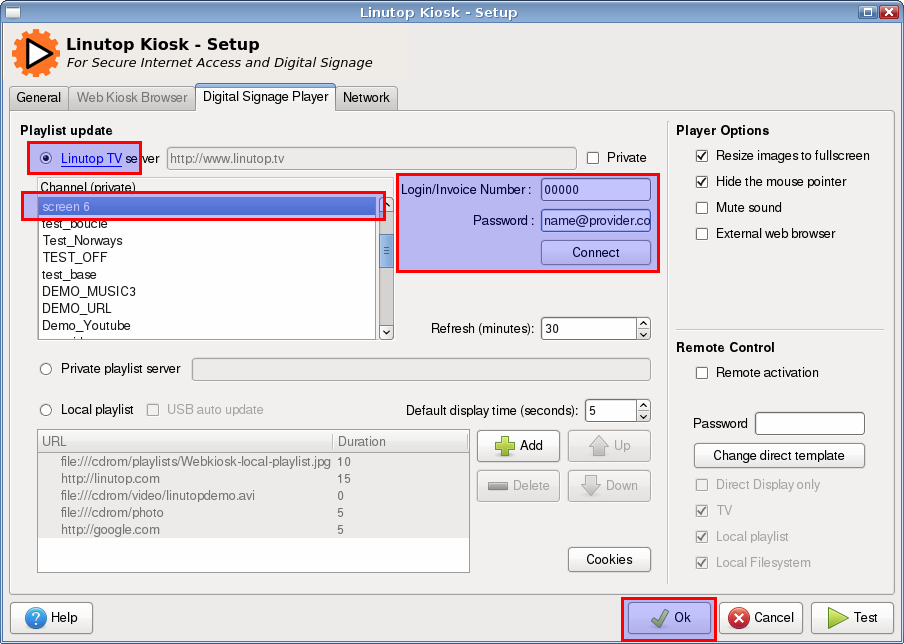
The Kiosk Configuration window opens. Click on "Linutop TV Server" and enter your id (invoice number and email address) and then sign in using the "Connect" button.
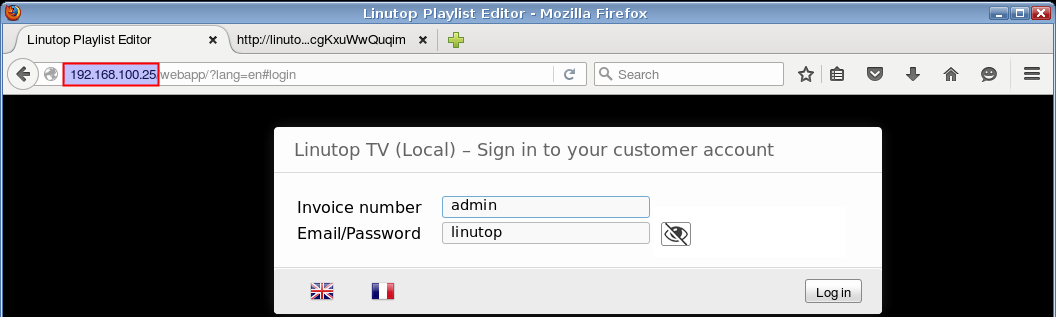
Player connexion to Linutop TV private server (on premise)
If you use a private server you need to select and to check then enter the url or ip address of your server. once done you need to use your login and password to access the playlist (by default admin/linutop). Then choose the playlist you want to display and hit the button.
To quit the kiosk application hit Esc. If a password is set, use Ctrl+q and enter your password instead.
Chapter 8. Local installation of your Linutop TV private server
For maximum privacy, a Linutop TV Server can be installed on your local network.
Operation of Linutop Private TV Server
The server works like a web server, players (linutop-kiosk) come every 30 minutes by default check playlists if they are new. It loads them and uploads the new elements that minimize network access to the server. Players store the media and will continue to run even if there is a network disconnect.
Server location and data storage:
- Server : /var/www/webapp
- Server data: /var/www/webapp/users/admin/
- Library : /var/www/webapp/users/admin/uploads
- Default templates: /var/www/webapp/common/templates
Choose server location
The Linutop.tv server must be installed in Linutop OS, which can work in different locations:
- In a virtual machine (VM) detail below
- On a PC
- On a Raspberry Pi
- In a Linutop player. In this case, the Linux kiosk works in parallel with the server on the same machine.
Network Configuration
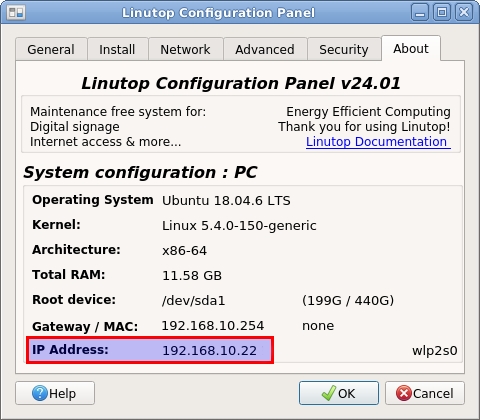
The server must be configured as a fixed IP, so that the players can connect to the same IP address
Linutop OS on PC can be configured as a fixed IP using the /etc/network/interfaces file.
auto lo
iface eth0 inet static

Address 192.168.1.81
netmask 255.255.255.0
gateway 192.168.1.254
Linutop OS (buster) on Raspberry Pi configured on fixed IP using the file /etc/dhcpcd.conf
interface eth0
static ip_address=192.168.1.81/24
static routers=192.168.1.254
static domain_name_servers=192.168.1.254
The communication between the Linutop.tv server and the player is done via the standard http protocol
Note: It is recommended to use a wired connection for stability
Installing the Linutop.tv private server in linutop OS
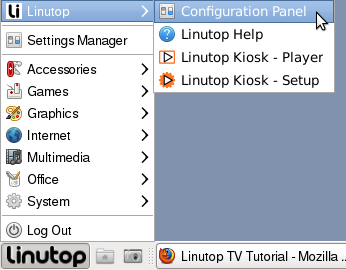
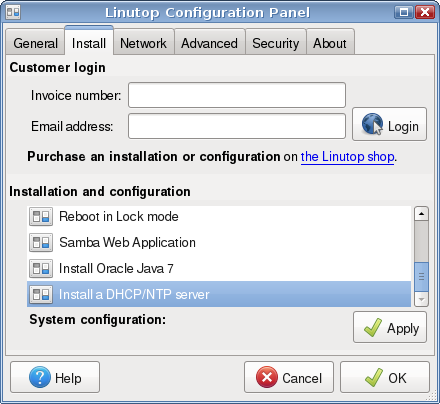
Go to the Panel Configuration : "Linutop" - "Configuration Panel".
In the "Install" tab, enter your invoice number and address email and confirm by clicking the "Login" button.
A list of available configurations appears in the bottom frame. Select "Linutop TV private server setup installation" in this list. Click "Apply".
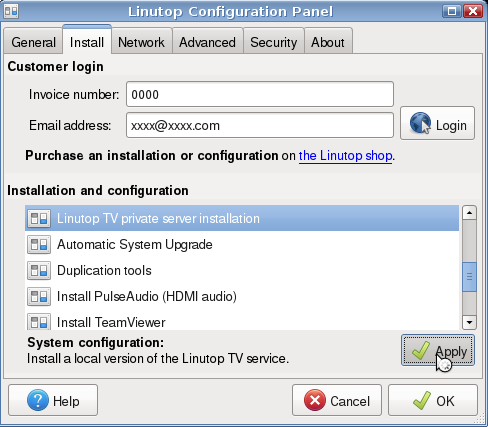
A message will confirm the installation. Exit Configuration Panel by clicking the "Ok" button.
Your server Linutop TV is now ready to use.
Now you can create your playlists.
Installation of your Linutop TV private server on a VM (Virtual Machine)
Process :

Create 2 storages in your MV, install ISO linutop OS, boot and install full Linutop OS on second storage. And then, remove the first storage and reboot on the Linutop OS Pro to install linutop.tv private server
Open VM VirtualBox Manager
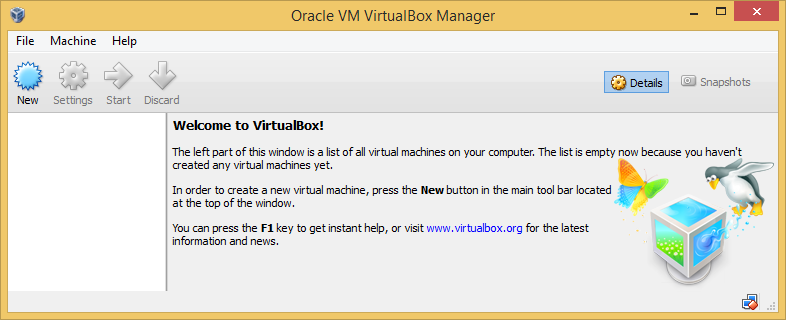
Select button New
Menus:
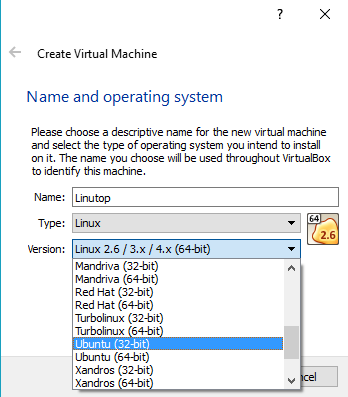
-
Name and operating system Name : 'Linutop' - Select Linux and Select Ubuntu (32-bits) and press "Next".
- Hard disk: Select Create a virtual hardisk now and press "Next"
- Hard disk file type : Select VDI and press "Next"
- Storage on physical hard disk : Select dynamically allocated and press "Next"
- File location ans size : Select 1GB or more and press "Create"
Now you Virtual machine is ready to receve the Iso Image
- Press "Settings" button
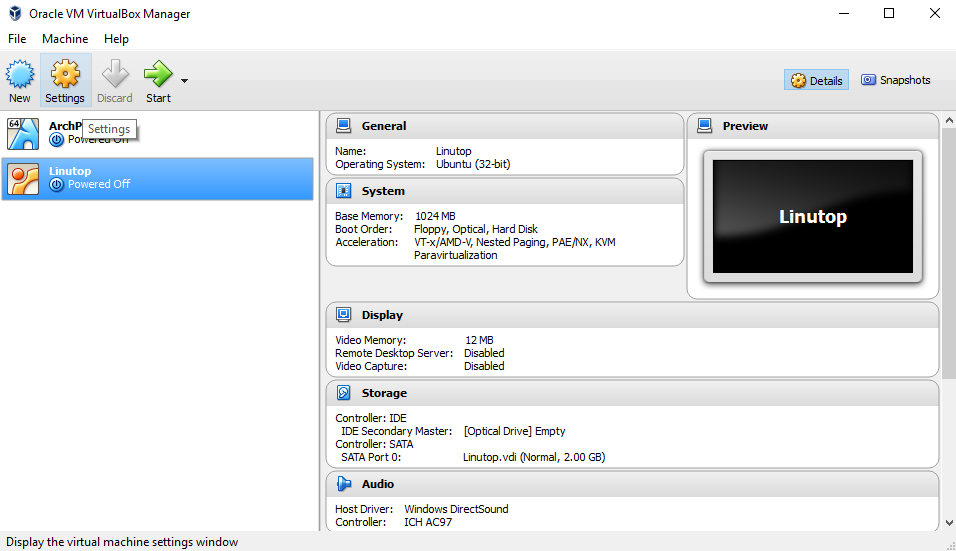
Press "Storage" button
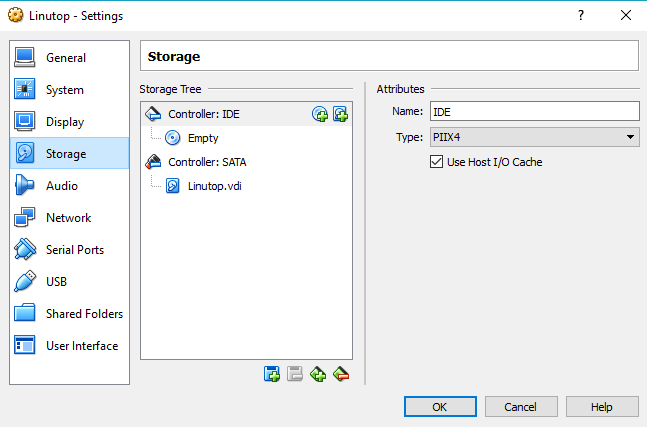
Press the small disk next to Controller IDE
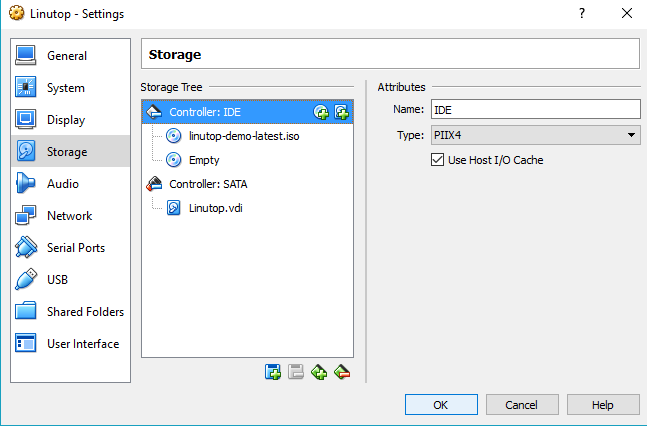
Choose disk and select the iso image
Your VM is ready to boot the Iso Image Just press start. You can now test linutop OS demo in your VM
To install the full version just use the install menu and install it on the second device :
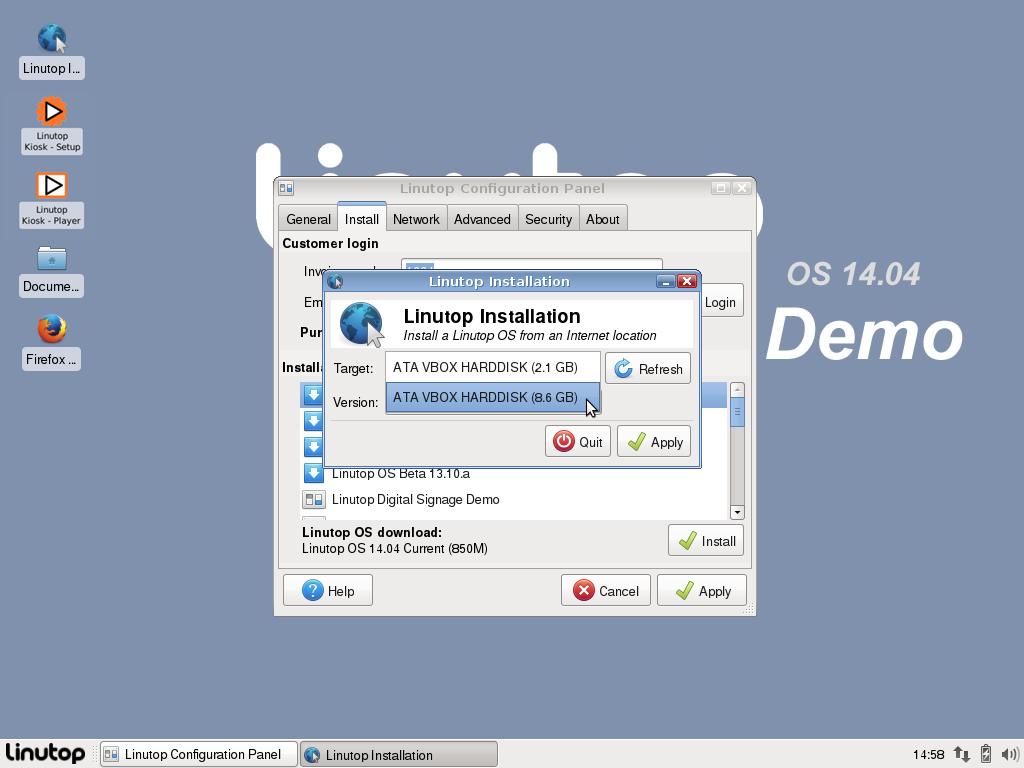
Once installed, you can removed the installed demo iso device and boot on the full version and then install your Linutop TV Private Server and proceed like a private local private installation (Chapter 8).
Chapter 9. FAQ
Interface doesn't respond
Your session may have expired, your just have to refresh the web page and reconnect yourself to solve this problem.
No update
- Check the connection with the player, either it is no longer in contact with the server or it comes from the update delay 30 min maximum.
- It is possible to relaunch the player to force an immediate update.
- The players clock is not up to date, you have to adjust the time zone in Linutop configuration panel, or verify that the NTP protocol is on the network to synchronize the clock of the Raspberry PI.
White screen
- The player is loading the Playlists and files, wait or check the connection speed if the timming is too long.
Black screen
- The screen may be in standby? Check the playlist programmation.
- The screen is shut down, some screens goes in standby depedning on their own timer.
- The HDMI cable is unplugged or the screen is not on the right HDMI entry of the player.
Can I use the QRcode for a restaurant menu
Yes, you need to put the images on the menu in a playlist, then print the QRcode and put in ont the tables.